Teaching Myself to Sew, Sew RIGHT!

Thursday, November 30, 2006

Upcoming Video plans

Well, although I don't have the best equipment, I am going to be doing these videos with some converter software and my digital camera. It's not a video camera, but it can take videos. You may have seen the one sewing video I did in a previous post on threading a sewing machine. I have a plan to update that video to a newer and better version using both a vertical and a horizontal sewing machine, and I have plans for other video content.

There's a lot of information out there that isn't being shared freely. Just as I do, in this blog, I want to share more sewing information freely via visual learning. At first there will be basic videos, and if it helps a lot of people, I will go more in depth with other things. I will probably need a real cam for that though.

Future video plans:

Parts of a Sewing Machine
Using a Sewing Machine for the First Time
Basic Stitches
Machine Maintenance
Setting and Determining Tension

ADV: Presser Feet Functions
Special Stitches

Parts of a Serger
Threading the Serger
Using the Serger


If you haven't seen my YouTube channel yet, it's http://www.youtube.com/profile?user=humblestumble

I am already starting to write out the content for my first few videos. I've noticed that when I don't have anything prepared, I don't sound very smart, and the video is much longer than intended. I want this to be precise and easy to follow, and especially easy to watch. They haven't been so easy to watch, as I am finding out. (I actually have already made videos, but I don't want to reveal them yet because they are bad.)

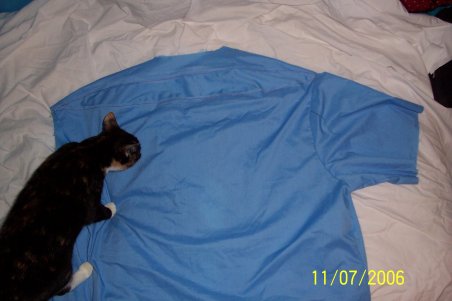
I hope you are looking forward to them! I am excited to start. (As long as my cats don't get in the way like they have been!) I can't say when each video will be released, but I hope to have at least the first 2 or 3 out very soon.

Wednesday, November 29, 2006

Thoughts, and boredom

Well, I guess it's just one of those days! I'm quite bored, and not sure what to do with my day. Especially since I've gotten this new blemish that I am not proud of, and I mean that in the literal sense of the word. I was supposed to go to the gym today, but I don't even want to leave the house!

But, Alas, I have to. At least, I have to, to get rid of some of this boredom. And in getting ready to go 'out,' I've drawn outside my lips with lipstick to hide THE BLEMISH. It's quite hilarious. Ooh, I feel like I'm speaking in an English dialect on this entry!

All the things I could be sewing right now! My purse, the shirt, the petticoat...Actually, I think i will fix that moebius strip now before I am picked up. So tata! :D

Monday, November 27, 2006

Tension Settings

I'm starting to keep track of the tension settings for my machines...

Tulle (serger) : 0, 2.5, 8.5, 4.5; Differential feed: 1.5; Stitch length:3
(Sewing machine) : 5.5 Tension; Foot Pressure: 2

The Petticoat Saga continues...

Well, today before being picked up, I have started actually SEWING my petticoat. Boy, it's a lot more work than I thought! The biggest obstacle for me was getting through the yards and yards of strips to find the end to sew to the next end. 32 yards for the second layer is a LOT of fabric! Whooaa. I ended up rolling the tulle around my chair so that I could find the end, but that didn't really work as planned, so I had to sit on my bed and sort through it all. And that STILL didn't work.

I finally sewed it together...and I discovered my gathering foot, which I LOVE to peices. Saves tons of time! It probably scrunched up a yard to be only 1.5 feet, which is all I needed. Although, I am still not done because I didn't sew the strips into a circle of tulle correctly...It's now a moebius strip (meaning one end is twisted), so now I have to take out some gathering stitches and flip one end to meet the other correctly to make a circle. Shouldn't take too long.

It would've been copacetic if I had someone here to help me with all those yards of tulle. But it was fun, though tedious, and MUCH better than paying a TON of money for one that's premade. I may continue making it tonight, and maybe work on Benjamin's shirt.

Speaking of which, I really want to make a yoke for him one of these days, but I'll definitely need practice, especially since I don't have a pattern for one. A yoke is "fabric comprising a fitted part at the top of a garment"...It's a feature used a lot in rockabilly shirts (and many many other outfits, like smocks and such with a totally different look and appeal). Rockabilly shirts usually have a western feel to them, and I love the look of them when done the neo-rockabilly way. Here's a link to show what I mean. Makes my heart faint.

Saturday, November 25, 2006

I've gone and done it...

I've saved every page and image from vintagesewing.info's 1942 sewing book. You never know when they are going to go offline. After all, they haven't updated since 2004, and the website supposedly expires in 2007 February. So I figured, what the hey. It's going to be REALLY hard to get a copy of that book, and it is great. I might even save the other 1940s book there. I so wish they had published (online) the 1957 dressmaking book. I'd be in heaven.

Thursday, November 23, 2006

T Shirt Surgery: Boatneck


I made a boatneck "ringer" type Tshirt today! Last night I swapped the sleeves off of another t shirt and today I added the band and cut off the neckhole. Now I have a boatneck T shirt :) At first there was some gaping, but following the advice of an online t-shirt serger, I took it in about an inch and a half in the back - adding a seam where there wasn't one! So, tada!

Fitting a Man: Part 2

Today I continued the fitting process for Ben. We had some trouble with the under arm and side arm bunchnig up from all the extra fabricI had to pin out some of the extra material I had added vertically to each shirt peice. I found out that he only needed godets inserted. These will not be shown on the final garmet, since this is only a mock up, but they are needed for his fitting. They are VERY slender and very tapered. So now, although hard to tell, his shirt is shaped like a bell. I am wondering how exactly I will make up the rest of the shirt, since I only had it partially put together for this fitting. I will need to just mock what I did to one side and do it to the other. We didn't end up using the round back modification after all. I think the next thing will be adjusting the hem and the neckline. Then we'll be ready to go :D

Monday, November 20, 2006

Tulle time...


Well, I don't know what compelled me to do it today, but I actually started on my petticoat! I have gotten a few ideas online from people and various sources, and I've decided to go with one I found on Petticoat Pond. It's very simple and it's from the 1950s. I will do a narrow hem, not a satin binding. And my hem will have 32 yards, not 48 (A LOT, I know!)

The only thing I did today was cut out the strips of tulle. It may still be a while before I actually make more headway with this. I still have to go get some satin or something for the top circle layer. I don't want to sit on the scratchy tulle. Not only that, but I don't want chaffing, so I also need some more undergarments. (Too much info??) Perhaps bike shorts will work though.

Anyway, I know you may be curious as to how to make it, so I will host the instructions here along with a link to the original website I obtained it from. The only reason I am doing this is because, being a webmaster of a few websites, myself, and having gone through a class about web design, the Petticoat Pond website's layout is very poor to say the least, and it's VERY hard to navigate. Everytime I wanted this pattern I had to REALLY dig for it. Poor navigation is the number one reason people leave websites and don't go back.

Petticoad Pond: Alice Lon's Petticoat

"The chief difference between ordinary petticoats and those songstress Alice on is modeling on these pages is that Alice’s mother made these. And, judging from the mail (more tan 9000 TV GUIDE readers have requested directions since the petticoats were mentioned in the May 26th issue), lots of readers are interested in the difference. They wonder about the secret of the petticoats’ fullness (each 48 yards around the hem) and their light weight (12 ounces). Alice boasts 25 of them, all told, and has a hard time keeping up with letters from envious girls who write asking how she can wear one at a time while they need at least two to make skirts stand out the there. What’s more, Alice’s mother, Mrs. Lois Wyche, of Kilgore, Tex., uses only nine yards of material to achieve the bouffant effect, turning out a petticoat on her sewing machine in about three hours.

For those readers who are handy with a needle, TV GUIDE here with published Mrs. Wyche’s instructions for making these petticoats. These directions were originally sent out by the American Broadcasting Company (Alice works for ABC’s Lawrence Welk) in response to the requests which followed the mention here.

Materials: nine yards of Nylon net – 72 inches wide; 48 yards of satin ribbon – one-inch wide.

Cut top with net double thickness in complete circle. Length of top depends on person’s height.

Cut remaining eight yards of net lengthwise into eight strips, each nine inches wide. Each strip will be eight yards long. Gather and sew two strips of net to bottom of circular top. Gather and sew the remaining six strips of net to bottom of first ruffle. Bind bottom with ribbon. Finished petticoat is 48 yards at hem."


If you have any questions, feel free to ask. I FINALLY figured it out. If I am bored later, I will draw out directions.

Sunday, November 19, 2006

Out with the old, in with the new.

Well, my birthday has come and gone, along with the weekend. (My birthday was this Friday.) It was a good birthday. I'm now really an adult. I'm 20 years old. Good-bye teen years. I won't miss ya.

I got a new TV, an antique biography of Charlie Chaplin, The Little Mermaid DVD, and a DVD/VCR combo. What more could a girl want? :D Well, there's plenty of other things, but I am satisfied and floored by what I received this year. I also dressed up for my birthday, expecting to go out to eat and see a movie, but I just went to Quizno's. I even did up my hair! (see photo) The first time I ever got that right!

Realizing I looked great from the neck up, I was more than a little perturbed that the rest of my look didn't live up to my head. So, you know what that means! You got it, out with the old, in with the new! These days, it seems like I'm doing more out with the old than in with the new. I've gone through my wardrobe now, oh, about 3 times in the past two years. Almost all of it is gone.

I used to have a TON of clothes. Mostly shirts. Well, I am now retiring a lot of my shirts, especially being that most people still think me to be a teenager (a middle-schooler to be exact). And praytell what am I to do with these shirts? Well, make a T-shirt quilt OF COURSE! It will be my first quilting adventure. I'm hoping it will be a simple one. I'll need to buy non-stretch iron-on interfacing (so the knit shirts don't curl), and maybe some sashing (I believe this is the border/grid around all the t-shirt squares). I really need something to relate to all of the colors of the shirts and make it less of a patchwork. Most of my shirts are grey and white, so black goes with everything.

I'm planning on making the backing out of flannel. I believe this is what my current comforter is made of, and I love it. I HATE how it looks, but it's so warm and cozy, I just can't help but love it. There's no tag, so I can't say for sure, so I'm gambling on that one. Flannel is nice and warm though, so either way, that shouldn't be a bad choice. I'm actually going to do my quilting in the ditch though. I really want to show off the shirts. This is going to be a quilt of memories - all mostly from my school years. I'm tired of wearing all my old school t-shirts around. I swear, people must think I'm still a child with them.

Unfortunately, (or fortunately) for me, that means I have to really get on the ball and learn to sew and adjust clothes and patterns for me. This is one reason why I bought Vogue Sewing. There's a section in this book just for advanced alterations. I'm looking forward to it, but I am scared! I am hoping to, by the end of the year, be in the American Sewing Guild so that I may have some assistance.

I am also thinking of sewing Mexican puebla dresses for my boyfriend's mother's business. People always call her around Cinco de Mayo for dresses, and this will be perfect for me to really get started sewing clothes (and as a major plus, I'd get an embroidery machine!)...It's up in the air, but it's an option for more money for my own wardrobe!

So, I am hoping that, maybe tomorrow, I will start on that purse finally (I know, it's been so long since I bought that fabric!) I hope this will jumpstart me onto the right track.

Wish me luck,
Jella

Saturday, November 11, 2006

Review: Fabric Savvy

This is a short but sweet review - Fabric Savvy by Sandra Betzina is a MUST HAVE for everybody! Period, nuff said. No, I'm kidding. But, if you intend to be a consistent, sewer with a multitude of fabrics and professional (or at least honorable) looking finished product, you must have this book! Unless, that is, you know yor fabrics, how to press them, preshrink them, stitch width and length, presser foot, and all that stuff. I always thought of making my own reference like this for myself, but it's nice to have it to myself with someone else's guidance and tips. I feel like I found a gold mine with this book. 8 bucks! A steal :)

Who knew there was so much to know about sewing?

Tuesday, November 07, 2006

Fitting a Man for a Custom Fit Shirt.


Well, I've begun my fitting journey. The hardest part was letting go of the fear of cutting the fabric. Even though it was so cheap, it's hard to really muster up the guts to cut an already cut fabric peice. After getting over that, I am feeling a boost of motivation and confidence!

I started out a bit on the wrong foot, but that's okay. It's easily remedied. I hope to be done with the fitting soon! (Toga, my cat, loves the camera, and fabric)